Working with Variables
Variables are essential for storing and manipulating data within Custom Command. There are two primary types: temporary and permanent.
Temporary Variables
Temporary variables exist only during the execution of a command. They are easy to access and are ideal for storing intermediate values during data processing. Think of them as scratch paper for your command.
How to Use Them
[$let](../Variables/let.md]- Define: Creates a temporary variable and assigns a value to it.[$get](../Variables/get.md]- Access: Retrieves the value stored in a temporary variable.
You can also access temporary variables directly by prefixing their name with a dollar sign ($). For example, $name will return the value of the temporary variable named name.
Examples
1. Basic Usage: Storing and Displaying Information
This example demonstrates how to store information about a user (Bob) in temporary variables and then use those variables to construct a personalized message.
// Save Bob's information
$let[name;Bob]
$let[age;23]
$let[job;cashier]
$let[workplace;a local supermarket]

// Send Bob's description
I am $name, and I am $age years old.
I work as a $job at $workplace.
Output:

The variables $name, $age, $job, and $workplace are replaced with their corresponding values, creating a dynamic message.
2. Saving Function Output: Capturing Command Parameters
Variables can store not just static text, but also the output of functions. This is useful for capturing and using information passed to a command.
Consider a !report command used to report users:
!report [User] [Reason]
Here's how to capture the user and reason using temporary variables:
/* Note:
    Using '$user' directly might interfere with the built-in $user function.
    Therefore, we will use the $get function to access the variable.
*/
$let[user;$message[1]]
$let[reason;$message[2+]]

$mention has reported $get[user] for $reason
Explanation:
$message[1]retrieves the first argument passed to the command (the user being reported).$message[2+]retrieves all arguments starting from the second one (the reason for the report).
Output:

The command successfully extracts the provided parameters and incorporates them into the report message.
Permanent Variables
Permanent variables persist even after the command execution is complete. They are stored and associated with specific Discord components:
- Server: One value shared across the entire server.
- Channel: A separate value for each channel.
- User: A unique value for each user on the server.
- Message: A value tied to a specific message.
Permanent variables are ideal for storing settings, user profiles, and other data that needs to be retained over time.
Naming Convention
Functions for working with permanent variables follow a consistent naming pattern:
$[action][vartype]Var
Where:
[action]is eitherset(to assign a value) orget(to retrieve a value).[vartype]is the component the variable is attached to (e.g.,Server,Channel,User,Message).
For instance, to set a variable associated with a message, you would use $setMessageVar.
Examples
Where is the data stored?
Permanent variables are not stored within discord itself; Custom Command stores them in its database. If you have privacy concerns, please consult the Privacy Policy.
1. Server Variables: Creating a Welcome Message
Let's define a server variable called welcomeMsg to store the content of a welcome message for new members.
The !!exec prefix is needed to execute the command directly in chat. The $setServerVar function assigns the value "Welcome to the server!" to the welcomeMsg variable for the entire server.
Now, let's create a !hello command that retrieves and displays this welcome message:
$getServerVar[welcomeMsg]
Output:
The $getServerVar function retrieves the stored welcome message and displays it.
2. Channel Variables: Channel-Specific Descriptions
Channel variables allow you to have different values for the same variable across different channels. This is perfect for storing channel-specific information.
Let's define a description channel variable for two channels: "Help" and "Bots."
$channelID[Help]and$channelID[Bots]retrieve the IDs of the "Help" and "Bots" channels, respectively.$setChannelVarassigns a specific description to thedescriptionvariable for each of those channels.
Now, let's create a !channel command that displays the description of a specified channel:
$getChannelVar[description;$findChannel[$message]]
Explanation:
$findChannel[$message]searches for the channel name provided as input to the!channelcommand.$getChannelVarretrieves thedescriptionvariable for the channel found by$findChannel.
Output:
As you can see, the !channel command displays the correct channel-specific description.
3. User Variables: Personalized Profiles
User variables allow you to store unique data for each user on the server, enabling personalized experiences.
This example creates an !aboutMe command for users to set their profile descriptions and a !profile command to view other users' profiles.
!aboutMe Command: Setting the Description
Here's the code for the !aboutMe command:

// Set the description to "aboutMe" variable
$setUserVar[aboutMe;$message]

// Send confirmation text
Your about me has been set successfully
$setUserVar stores the user's provided description in the aboutMe variable, specific to that user.
Now, let's see how two different members, Member and Steve, set their descriptions:

!profile Command: Viewing Profiles
Now, let's create the !profile command to display users' profiles:

// Author embed field
$title[$username[$mentioned[1]]'s profile]
$thumbnail[$userAvatar[$mentioned[1]]]

// Load description from user var
$description[$getUserVar[aboutMe;$mentioned[1]]]
Explanation:
$mentioned[1]refers to the first mentioned user in the command.$usernameretrieves the username of the mentioned user.$userAvatargets the avatar URL of the mentioned user.$getUserVar[aboutMe;$mentioned[1]]retrieves theaboutMevariable for the mentioned user.
Output:
The !profile command successfully retrieves and displays the correct descriptions for each user, demonstrating the power of user variables.
4. Message Variables: Dynamic Button Handling
Message variables are associated with a specific message, allowing you to store data related to that particular message. This is particularly useful for interactive components like buttons.
This example demonstrates how to create a nickname change request command that uses a message variable to store the requested nickname for approval via a button.
!nickChange Command: Requesting a Nickname Change
The !nickChange command:
- Captures the requested nickname from the user's input.
- Sends a request message to a staff channel, including an "Approve" button.
- Saves the requested nickname and the user who made the request in a message variable attached to the request message.

// Save requested nickname to $let variable
$let[requestedNick;$message]

// Send a prompt to #staff
$channelSendMessage[$channelID[staff];
    $mention has requested a nickname change to `$requestedNick`
    {button:Approve:green::approve}
]

// Save the nickname in a message var (with a name of "nick") attached to the prompt message ($sentMessageID)
$setMessageVar[nick;$requestedNick;$sentMessageID]
// Store the requesting user
$setMessageVar[user;$authorID;$sentMessageID]

// Confirm submission
Your request has been submitted successfully, we will let you know once it gets approved.
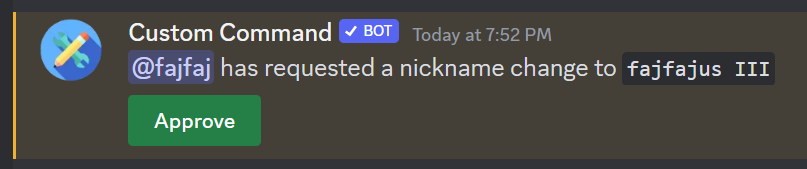
When a user uses the !nickChange command, a message similar to this will be sent to the #staff channel:
Approve Button Handler: Processing the Request
Now, let's create a command that is triggered when the "Approve" button is pressed.

// Save the new nickname to a $let variable
$let[nick;$getMessageVar[nick]]

// Grab the user ID
$let[usrID;$getMessageVar[user]]

// Change nickname
$changeNickname[$usrID;$nick]

// Notify the user
$channelSendMessage[$channelID[bots];
    <@$usrID> your nickname has been changed to `$nick`
]

// Disable the approve button
$disableButton[$messageID;approve]
Explanation:
$getMessageVar[nick]retrieves the requested nickname from the message variable named "nick" attached to the message that triggered the button press.$getMessageVar[user]retrieves the user ID of the requesting user.$changeNicknamechanges the user's nickname to the approved nickname.$channelSendMessagenotifies the user in the#botschannel.$disableButtondisables the "Approve" button to prevent duplicate approvals.
Now, clicking the "Approve" button will change the user's nickname accordingly.

Message ID
Notice that we didn't explicitly provide a message ID in this command. This is because the default value for the third parameter of functions like $getMessageVar is $messageID, which automatically refers to the ID of the message that triggered the command (in this case, the button press).
Server owner
Discord doesn't allow bots to change the server owner's nickname. If the server owner uses this command, the bot will reply with an error message.